一、前言
因为rust拥有着极高的性能,加上tokio这个非常优秀的运行时,这使得rust很适合被用于开发服务器。
目前rust已经拥有了众多的web框架,例如rocket、axum、axtix-web、tide、warp等等。
而axum这个web框架是由tokio团队所维护的,相对来说,可能在某些方面更加专业,所以本文也将以axum框架来介绍rust的web框架开发。
二、基本使用
axum框架是构建于tokio之上的,所以你想要使用axum,首先就需要添加tokio包。
下面是一个最小的依赖包:
[dependencies]
axum = "0.7.5"
tokio = { version = "1.39.2", features = ["full"] }
将上面两个依赖项复制到你的项目配置文件中,我们就可以开始开发web项目了。
首先,写好main.rs文件中的异步入口函数:
axum-mainsrc/main.rsuse axum::{routing::get, Router};#[tokio::main]async fn main() { let app = Router::new().route("/", get(root)); let listener = tokio::net::TcpListener::bind("0.0.0.0:3000").await.unwrap(); axum::serve(listener, app).await.unwrap();} async fn root() -> &'static str { "Hello, World!"不清楚tokio基本使用与原理的,可以先去看看这篇文章:rust异步库tokio入门
然后写好基本的axum服务器启动代码:
use axum::{routing::get, Router};

#[tokio::main]
async fn main() {

    let app = Router::new().route("/", get(root));

    let listener = tokio::net::TcpListener::bind("0.0.0.0:3000").await.unwrap();
    axum::serve(listener, app).await.unwrap();
}

async fn root() -> &'static str {
    "Hello, World!"
}

// 下面的处理函数集中展示常用的提取器、响应类型和中间件写法。
#[derive(Debug, serde::Deserialize)]
struct ArticleQuery {
    id: u64,
    is_vip: bool,
}

async fn get_article(axum::extract::Path(id): axum::extract::Path<u64>) -> String {
    format!("你请求的文章 id 为:{id}")
}

async fn query_article(
    axum::extract::Query(query): axum::extract::Query<ArticleQuery>,
) -> String {
    format!("查询内容:{} {}", query.id, query.is_vip)
}

#[derive(Debug, serde::Deserialize)]
struct ArticleBody {
    id: u64,
    is_vip: bool,
}

async fn post_article(axum::Json(body): axum::Json<ArticleBody>) -> String {
    format!("请求体内容:{} {}", body.id, body.is_vip)
}

#[derive(Debug, serde::Serialize)]
struct ArticleResponse {
    id: u64,
    is_vip: bool,
}

async fn json_response() -> axum::Json<ArticleResponse> {
    axum::Json(ArticleResponse { id: 100, is_vip: false })
}

async fn html_response() -> axum::response::Html<&'static str> {
    axum::response::Html("<h1>Axum HTML</h1>")
}首先是定义路由:
axum-mainsrc/main.rsuse axum::{routing::get, Router};#[tokio::main]async fn main() { let app = Router::new().route("/", get(root)); let listener = tokio::net::TcpListener::bind("0.0.0.0:3000").await.unwrap(); axum::serve(listener, app).await.unwrap();} async fn root() -> &'static str { "Hello, World!"所谓路由,就是我们在浏览器中看到的路径,比如本网站的一篇文章在浏览器上的链接为:
https://www.kucoding.com/article/229.html
去除前面的协议、域名,剩下的就是路由了:
/article/229.html
所以这里定义的路由/代表的就是网站的根目录。
每个路由都可以接收所有可能的HTTP请求,比如常见的GET、POST请求等,这些请求都对应于axum提供的方法。
比如GET请求,这里就对应于get方法,get方法的参数是一个处理该get请求的函数,比如这里的root函数。
更多路由定义方式会在后文介绍。
定义好了路由之后,我们需要为我们的服务器绑定一个地址:
axum-mainsrc/main.rsuse axum::{routing::get, Router};#[tokio::main]async fn main() { let app = Router::new().route("/", get(root)); let listener = tokio::net::TcpListener::bind("0.0.0.0:3000").await.unwrap(); axum::serve(listener, app).await.unwrap();} async fn root() -> &'static str { "Hello, World!"注意这里使用的是tokio库中的TcpListener,而不是标准库中的。
用其绑定了地址后,还需要将两者结合、应用一下:
axum-mainsrc/main.rsuse axum::{routing::get, Router};#[tokio::main]async fn main() { let app = Router::new().route("/", get(root)); let listener = tokio::net::TcpListener::bind("0.0.0.0:3000").await.unwrap(); axum::serve(listener, app).await.unwrap();} async fn root() -> &'static str { "Hello, World!"至此,我们一个最简单的服务器就搭建完成了,此时你就可以运行本程序:cargo run
并可以通过127.0.0.1:3000这个地址,在你的浏览器访问:
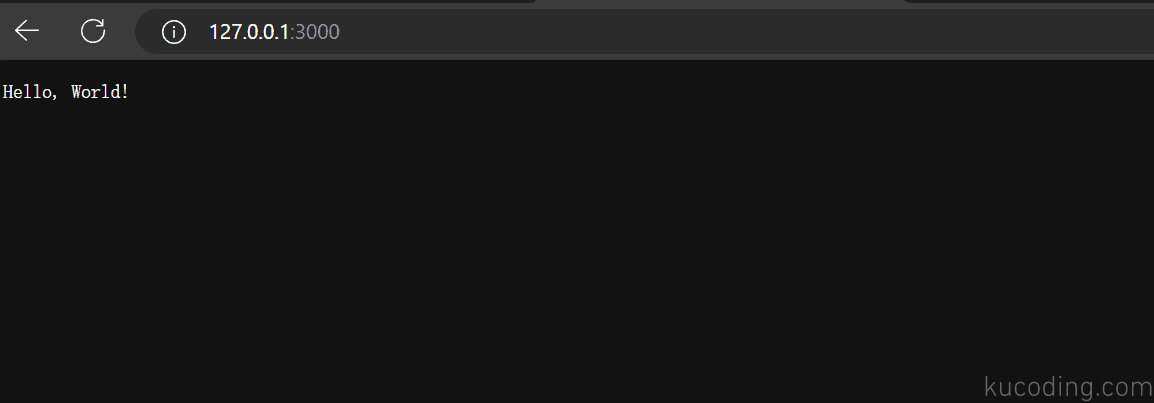
因为我么的根路径get请求所对应的函数只返回了一个字符串,其默认是文本类型、而非html文档,所以这里的背景是黑色的。
至此,我们就学会了axum框架的基本用法,下面,我们开始详解axum提供的各个方面的强大功能。
三、路由定义
首先我们如果想要在相同路由下定义多个请求方法的处理函数,可以这样做:
axum-mainsrc/main.rsuse axum::{routing::get, Router};#[tokio::main]async fn main() { let app = Router::new().route("/", get(root)); let listener = tokio::net::TcpListener::bind("0.0.0.0:3000").await.unwrap(); axum::serve(listener, app).await.unwrap();} async fn root() -> &'static str { "Hello, World!"也就是链式调用,get方法的返回值可以继续调用其上的post方法,传入post方法的处理函数。
当然也包括其它的处理请求方法,比如delete、put等等,都可以继续向上面这样写。
但要注意,虽然这里只有一个路由,但根据你处理该路由的请求方法数量不同,该路由所对应的处理函数就可能不止一个。
简单来说就是,一个路由可以有多个处理函数,每个处理函数都对应着一个处理HTTP请求方法。
而如果想要定义多个路由,那么可以这样做:
axum-mainsrc/main.rsuse axum::{routing::get, Router};#[tokio::main]async fn main() { let app = Router::new().route("/", get(root)); let listener = tokio::net::TcpListener::bind("0.0.0.0:3000").await.unwrap(); axum::serve(listener, app).await.unwrap();} async fn root() -> &'static str { "Hello, World!"方法也很简单,就是不断的在后面添加route函数、添加新的路由即可。
但要注意,同一个路由路径不能添加两次,否则运行会报错,如果想要处理其它方法,同样也是引入其它方法所对应的函数即可:
axum-mainsrc/main.rsuse axum::{routing::get, Router};#[tokio::main]async fn main() { let app = Router::new().route("/", get(root)); let listener = tokio::net::TcpListener::bind("0.0.0.0:3000").await.unwrap(); axum::serve(listener, app).await.unwrap();} async fn root() -> &'static str { "Hello, World!"这些方法都放在了routing这个子模块下。
当然,我们也可以使用动态路由:
axum-mainsrc/main.rsuse axum::{routing::get, Router};#[tokio::main]async fn main() { let app = Router::new().route("/", get(root)); let listener = tokio::net::TcpListener::bind("0.0.0.0:3000").await.unwrap(); axum::serve(listener, app).await.unwrap();} async fn root() -> &'static str { "Hello, World!"注意动态路由的写法,是在/后面添加:id实现的,重点是这个:符号,它标记了这是一个动态的路由。
此时它所对应的处理函数,你就可以通过Path这个由axum提供的方法,将动态路由提取出来。
注意这里的写法:Path(id): Path<u64>,是要写两遍的,前面是变量名,后面是变量类型,只不过外面多用了一层Path包裹了一下,含义就是从路径中提取变量id。
此时我们启动服务器,随便输入一个数字访问该路由:
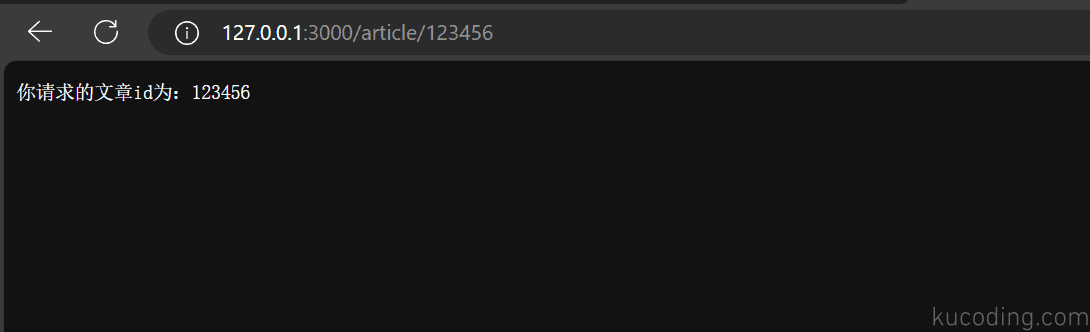
实际开发中,此时你就能通过这个数字,在自己的数据库中找到其对应的文章,并将其返回给用户进行展示了。
当然,你是可以定义多个动态路由的:
axum-mainsrc/main.rsuse axum::{routing::get, Router};#[tokio::main]async fn main() { let app = Router::new().route("/", get(root)); let listener = tokio::net::TcpListener::bind("0.0.0.0:3000").await.unwrap(); axum::serve(listener, app).await.unwrap();} async fn root() -> &'static str { "Hello, World!"请开通后继续阅读后续 70% 并运行完整示例~